
Drip Tray for Garage Floor: Pick the Right Size
A stained patch on concrete usually starts as one slow drip. A few weeks later it has spread, and the oil trail follows your shoes indoors. A drip tray for garage floor protection stops that, but only when it matches the leak above it. Too small and drops land on bare concrete. Too shallow and a sudden flow runs over the lip. This guide covers capacity, dimensions, and clearance so you can size a tray before you buy.
Table Of Contents:
Drip Tray Capacity Explained in Litres
Capacity is the volume a tray holds before liquid reaches the rim. Drip tray sizes commonly step up through 16, 32, 64, 100, and 120 litres. The smallest suits minor leaks at home or in a small workshop, while the larger ones cover industrial settings. Ratings vary between makers, so confirm the exact litre figure before you plan around it.
Most garage oil leaks are slow weeps from a seal or a hose clamp. A small tray copes with that for weeks. Extra litres earn their place on the bad day, when a hose lets go or a service drain runs longer than expected. Size for that moment, not the average week. A leaking vehicle also leaves a slip hazard on smooth concrete.
Larger volumes are the territory of spill trays, which are built for heavier loads and tougher chemicals. If your garage doubles as a workshop, spill trays are worth a look.
Dimensions and the Leak Zone
Litres say nothing about shape. Two trays can both hold 32 litres, one wide and shallow, the other narrow and deep. Makers do not always print length, width, and depth beside the litre rating, so ask for a dimension sheet before ordering.
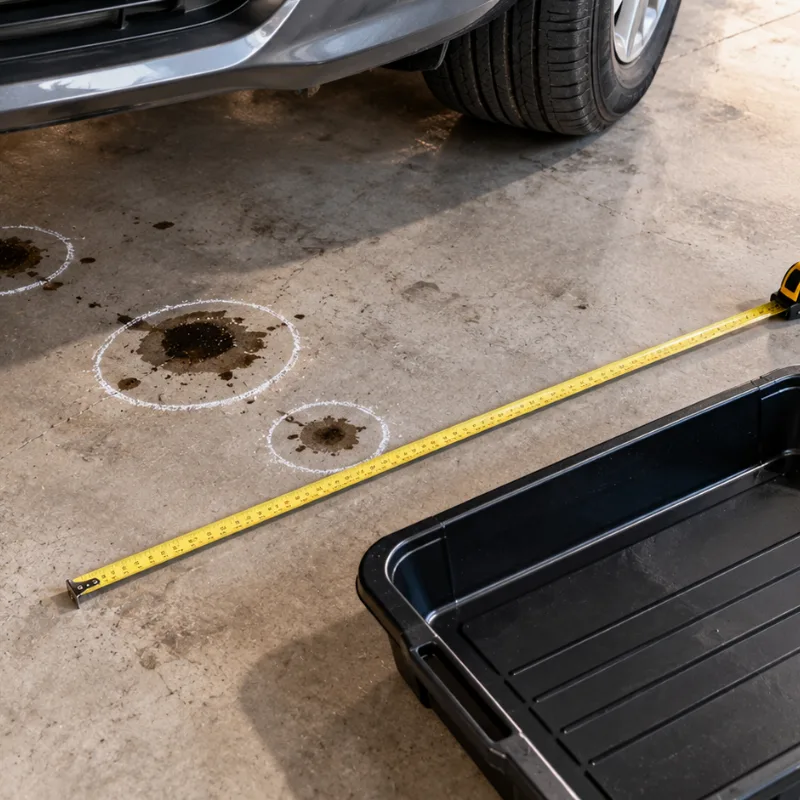
Then measure. Park the vehicle where it normally sits, mark the drip spots with chalk, and measure the area those marks cover. The tray has to sit under all of it. Cars rarely stop in the identical spot twice, so leave a margin around the patch. Service days differ as well, because a drain plug releases fluid in a different place from a slow weep. Mark that spot too.
Clearance Under the Vehicle and Around It
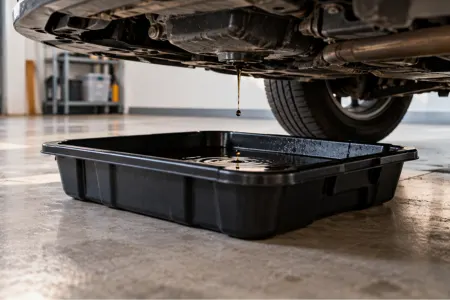
Depth is the dimension people forget. A deep sump holds more, yet it needs more gap between the floor and the underbody. Low cars, ramps, and jackstands all use up that gap.
Slide the tray into position with the vehicle parked. If you work on the car at home, repeat the check with your lifting gear in place. A tray wedged tight under the chassis is awkward to pull out once it holds liquid, and a full tray sloshes. Leave room to slide it out flat.
Also decide whether you want a tray that moves easily or one that stays put. For a single parking bay, fixed is simple. In a shared garage where cars rotate, easy-to-move wins.
Matching a Drip Tray for Garage Floor Conditions
Material changes the choice of drip tray for garage floor too. Plastic trays resist chemicals, while metal ones offer strength. Recycled polypropylene is a common plastic for oil and chemical use, and some trays are rated for hot liquids. Read the maker’s details against each liquid you plan to catch, since oil, coolant, and fuel behave differently.
Place the drip tray on level concrete. A tilt pushes pooled liquid toward one edge and shrinks the usable capacity.
A Simple Sizing Routine
- Start by marking drip spots with the vehicle parked.
- Next, measure the marked patch and add a margin.
- Then check the gap between the floor and the underbody.
- Last, choose a litre rating for the worst leak you can picture.
One note on safety. This article is general information, not safety engineering advice. Fuels and chemicals carry their own handling rules, so read the safety data sheet and follow local requirements for storing and disposing of used fluids.
Final Thoughts
Three numbers settle the sizing question: litres for the worst leak, footprint for the whole drip zone, and height for the gap underneath. Spectrum Lines works with spill containment products in the UAE, and the same three checks apply to any tray you compare. What does the patch under your car look like right now, and have you measured it yet?
FAQ
Start with the leak, not the catalog. Measure where the drips land, then pick a tray that covers that whole patch. For slow weeps, a small tray is usually enough. Bigger volumes call for bigger trays.
Usually fine for slow drips and minor leaks. If you drain fluids at home, more capacity gives you breathing room.
Depth matters more than most people think. Measure the gap between floor and chassis, then compare it with the tray's height. Check again if you use ramps or a jack.
Many are made from chemical-resistant material, and some are rated for heat. Read the maker's details for the exact liquid you plan to catch.
Depends on your routine. A fixed tray suits one regular parking spot. A tray that moves easily suits car swaps and service days.